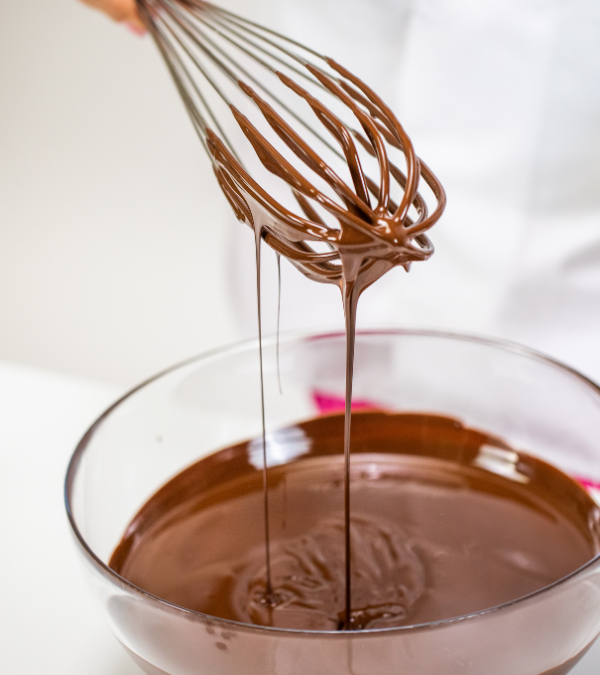
Melting Chocolate 3 Ways Without Seizing.
Seized chocolate. It’s one of the biggest frustrations in baking. Imagine for a moment you are melting some good quality chocolate for my delicious Healthy Ferrero Rocher Balls. One minute your chocolate is a silky smooth liquid, and the next minute it is a clumpy sludge!
Melting chocolate is not rocket science but it can be intimidating, especially if you’ve had it seize on you before. Following these simple tips will ensure your chocolate won’t seize and put you on the path to creating silky smooth liquid gold every time! No more clumpy seized chocolate!
What does ‘seized chocolate’ actually mean?
When melting chocolate comes into contact with even the smallest amount of moisture, it disrupts the melting process and causes the sugar, cocoa particles and water to bind together, causing the clumps of cocoa to stick together. This makes the chocolate a stiff, sludgy consistency and unfit to pour, dip or drizzle over your baked goods.
How to fix seized chocolate
Unfortunately, seized chocolate will never be quite the same, even if you salvage it. If you require a perfect shiny finish to coat your baked goods, your only option is to start again. However, let’s say it’s your last block, well, then it’s time to make the most of your seized chocolate and get work trying to fix it!
To do this, thoroughly mix one teaspoon of boiling water into your chocolate at a time until your chocolate becomes liquidy again. It won’t be suitable for a perfect finish, but if you just need to drizzle the chocolate or mix it into a recipe, it should work fine.
If you are using your seized melted chocolate for a ganache, just slowly pour hot cream or milk in instead, until you have reached your desired consistency.
How to avoid seized chocolate
Here are my biggest tips for avoiding seized chocolate.
- Ensure that all of your equipment is moisture free, including your bowls, utensils, the chocolate itself and your hands. I would also suggest not using wooden tools that can retain moisture
- Melt the chocolate slowly. When using the double broiler method (which is my favourite method), as soon as the water is simmering, turn it down to the lowest setting. This also helps to ensure the water doesn’t boil and splash over into your chocolate bowl.
- Never cover the chocolate when you are melting it, as the condensation may cause the chocolate to seize.
- Do not overheat or overcook your chocolate, especially white chocolate, which has a lower overheating point and will seize easier under high heat.
- Once melted, remove the chocolate from the heat source immediately.
Instructions for melting chocolate
Keeping all the above in mind, here are the instructions to successfully melt chocolate in the Thermomix, on the stove top or in the microwave.
Thermomix instructions for melting chocolate
Grate chocolate in TM bowl 3-5 secs / speed 9.
Melt for 3-4 mins / 50° / speed 2. Stop halfway through and scrape sides of bowl and any chocolate off blades that is not melted.
If chocolate isn’t smooth and runny after 4 mins, repeat in 30 sec bursts until it is.
Stove Top (double broiler) instructions for melting chocolate
Bringing a small pot filled with an inch or two or water to a simmer.
Place a heatproof bowl (preferably glass or stainless steel) that’s just big enough to sit on top of the pot without touching that water and add your chocolate to the bowl.
Keep the pot over low heat and stir the chocolate until silky smooth.
After removing your bowl from the double boiler, take a towel and wipe the bottom dry so as not to risk any water finding its way into the bowl. Water will cause the chocolate to seize.
Microwave instructions for melting chocolate
Place chocolate in a microwave proof bowl- glass would be my choice.
Microwave one minute on low/med
Stir the chocolate and repeat in 20 sec intervals, stirring after each interval, until chocolate is smooth.
To avoid overcooking, once the chocolate looks almost melted (maybe just a few lumps left), remove it from the microwave and just stir it until smooth.
Pro tip!
Adding a tablespoon of coconut oil helps the chocolate melt smoothly. The chocolate won’t set as hard as just plain chocolate, making it easier to cut into perfect pieces without cracking the chocolate! Heating your knife before slicing will also ensure that your chocolate coated slice or cake has a floorless, shiny chocolate finish.
Recent Comments